Installing Home Assistant and integrating it with Supla over MQTT
You have a Supla system and want to connect it to Home Assistant? In a moment you will learn how to do it over MQTT on a Raspberry Pi 4.
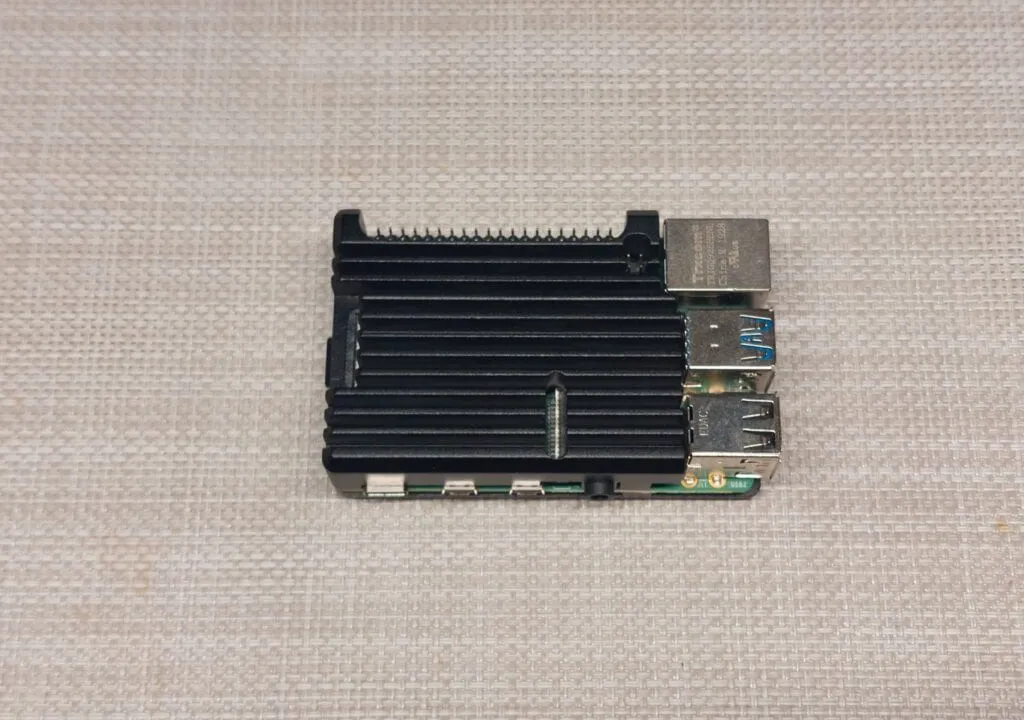
Table of contents
I work at ZAMEL. The devices described on this blog were made available to me by the company. All opinions and assessments are mine alone - the company had no influence on the content of the published articles.
This article may already be out of date. It comes from 2023.
Home Assistant — an open building automation system
This is an open project that puts local control and privacy first. Home Assistant lets you integrate many systems into one main system that manages them all. In fact, thanks to HA there are no limits when building very advanced building automation. All you need is a good enough machine and a bit of time to build a Smart Home.
I would like to show you, using a Raspberry Pi 4 as an example, how to install and then configure Home Assistant so that it works with the Supla system, for instance. Let me point out right at the start — I know there are many ways to install HA, and that this method of installing on a Raspberry Pi is not the best choice. Even so, I want to focus on one method and one device, so I can show quickly and easily how to integrate Supla with Home Assistant. Read on.
Installing Home Assistant
The description below is based on:
- Raspberry Pi 4
- A 64GB microSD card (Home Assistant should not be installed on SD cards — because they fail often — it is better to use an SSD drive — for more information, ask Google)
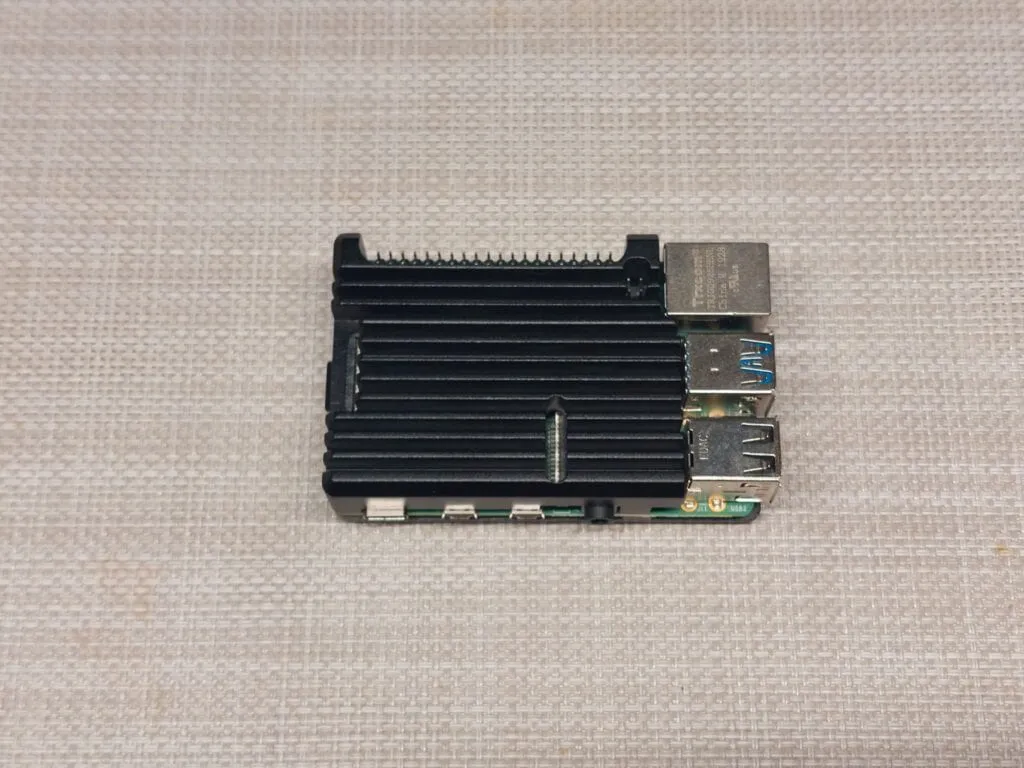
Raspberry Pi 4
Let’s start:
1. Go to https://www.raspberrypi.com/software/ and download the program.
2. Once the program is downloaded and installed, we can run it. Next we will install the Home Assistant system from a ready image. Choose the CHOOSE OS button and pick the system you want from the list. Go to Other specific-purpose OS.
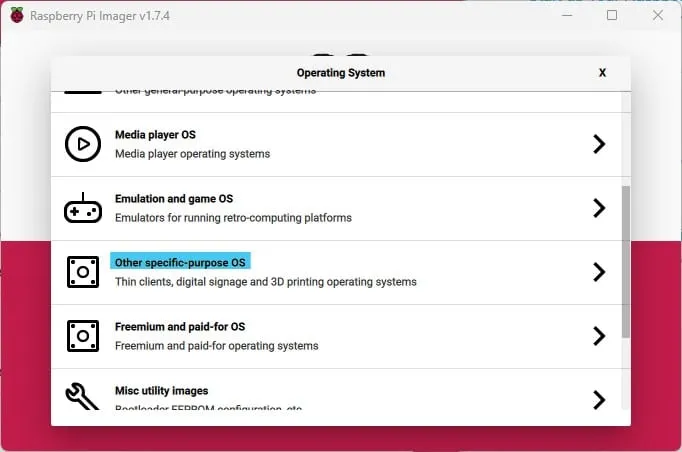
Raspberry Pi Imager - installation - choosing the system 1
3. Then press the Home assistants and home automation option.
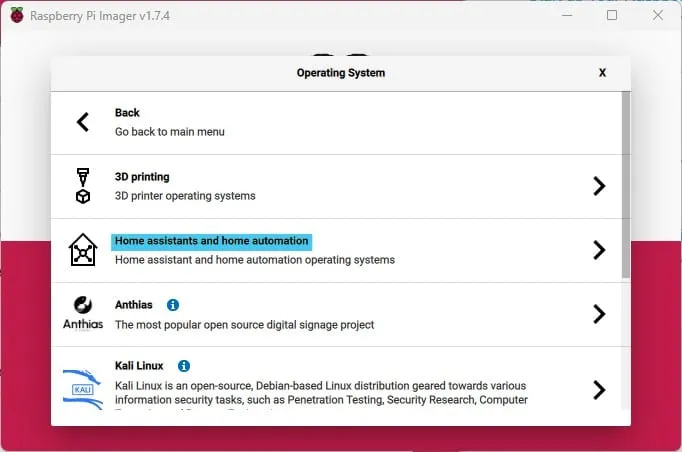
Raspberry Pi Imager - installation - choosing the system 2
4. In the next step choose Home Assistant from the list of systems.
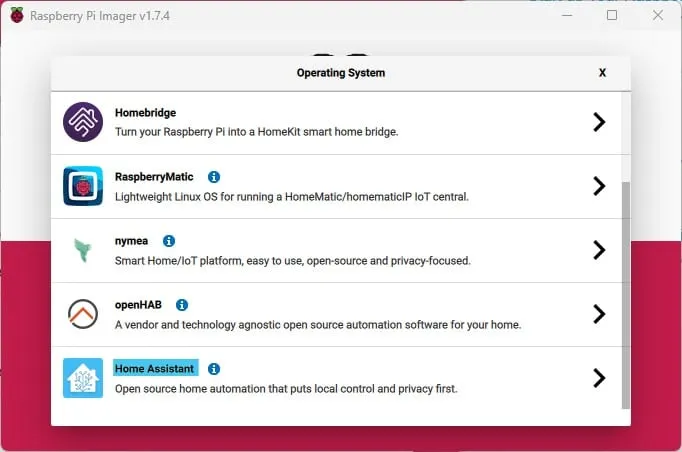
Raspberry Pi Imager - installation - choosing the system 3
5. Time to decide which version we will use. In my example it will be the version for the Raspberry Pi 4. From the list I go for the newest version, that is Home Assistant OS 9.5.
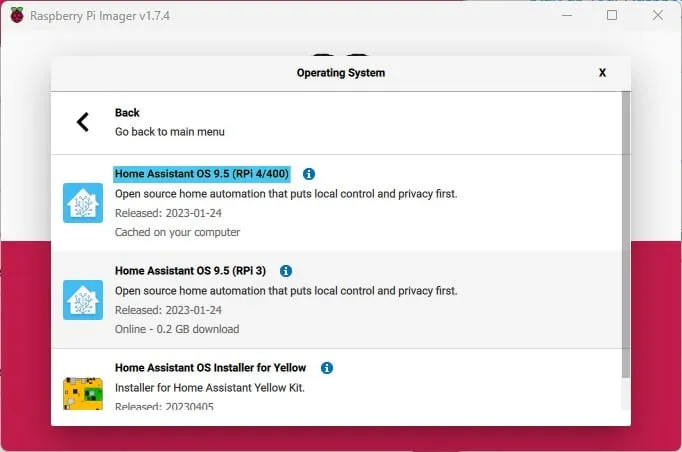
Raspberry Pi Imager - installation - choosing the system 4
6. After picking the right system we move to the next step, which is choosing the drive where our Home Assistant will be installed.
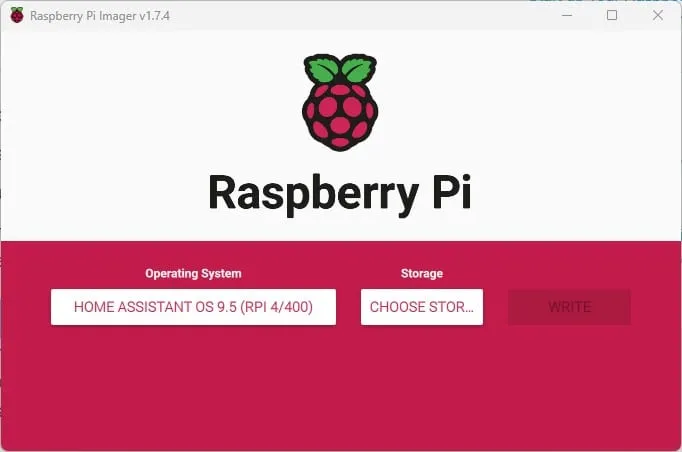
Raspberry Pi Imager - installation - choosing the drive
7. I select my microSD card.
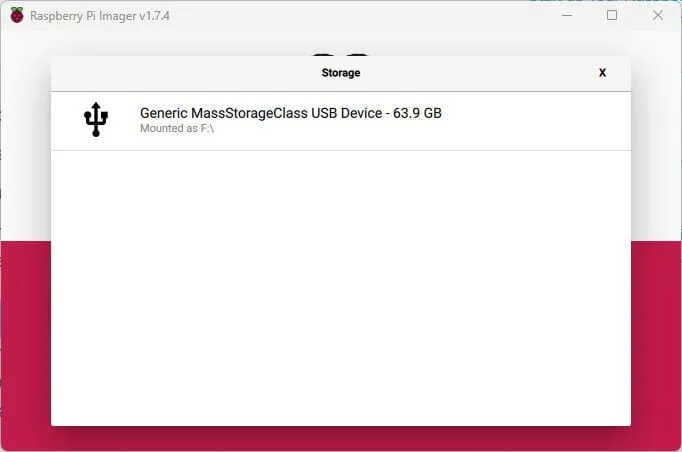
Raspberry Pi Imager - installation, choosing the microSD card
8. After choosing the drive I press the Write button and the program starts installing HA.
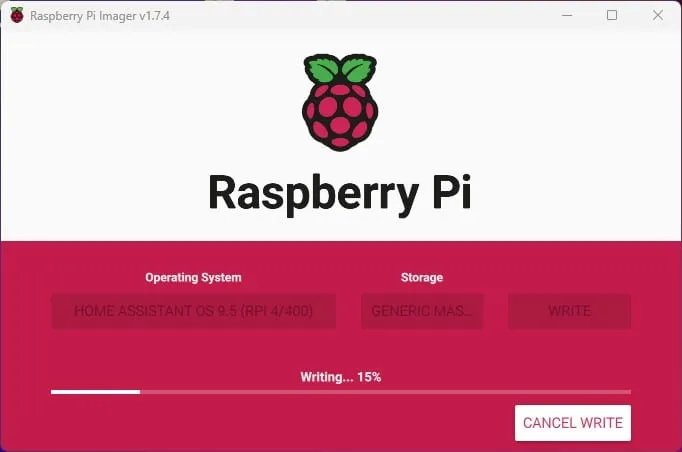
Raspberry Pi Imager - installing haos_9.5
9. Once HA has been written to the drive correctly, we will see this message.
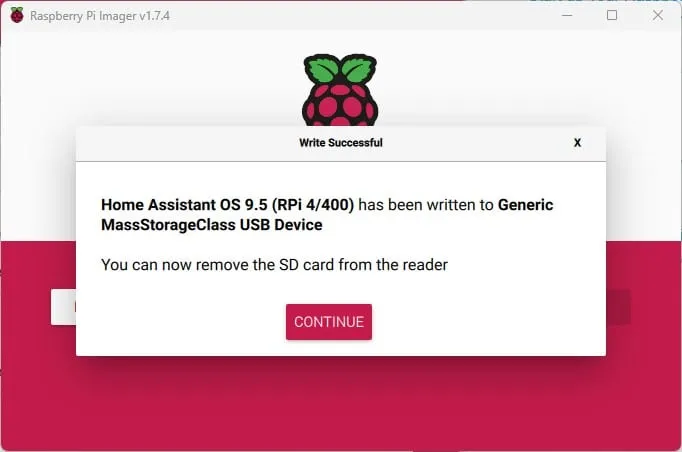
Raspberry Pi Imager - haos installation finished
10. Time to connect our Raspberry to the router. I strongly recommend connecting Home Assistant over an RJ cable. Now all we need is to check which address the router assigned to our “raspberry”.
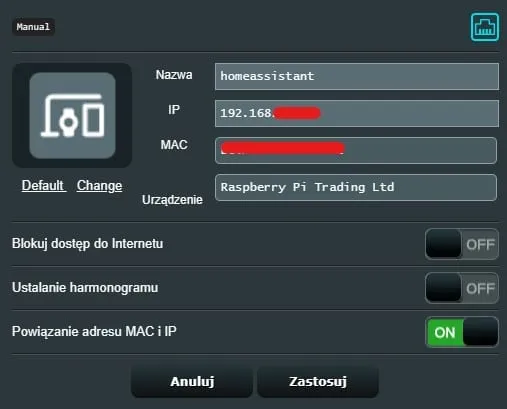
Home Assistant - network settings
11. We already have an IP address assigned to our Raspberry Pi, so we can move to our new system. To do that, open the browser and go to an address such as 192.168.1.1:8123 (here you enter your own IP address for HA and port 8123). A page should appear telling us that the system is being prepared.
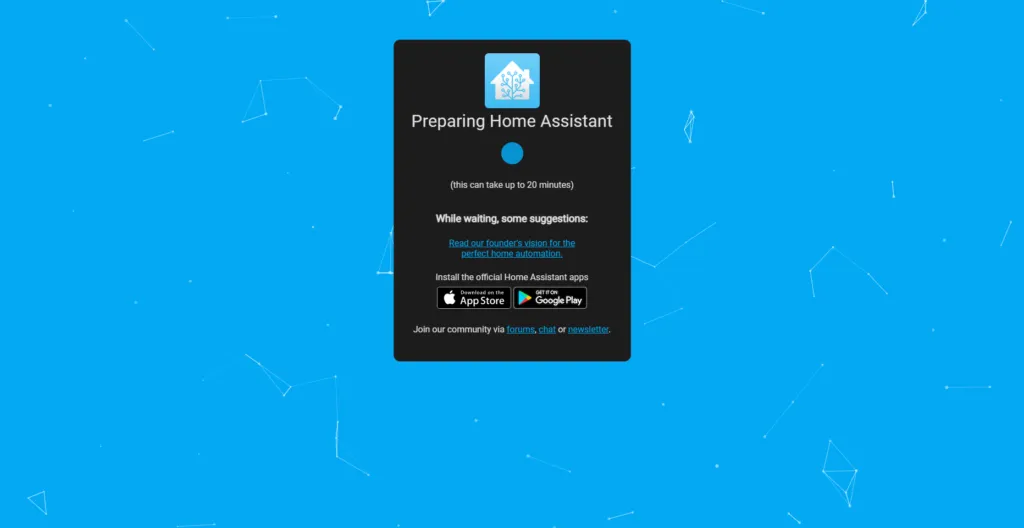
Installing HA
First start of the system
1. After a few minutes everything should be ready. We can move on to configuring our system. We enter the user details and the password. We press the Create account button.
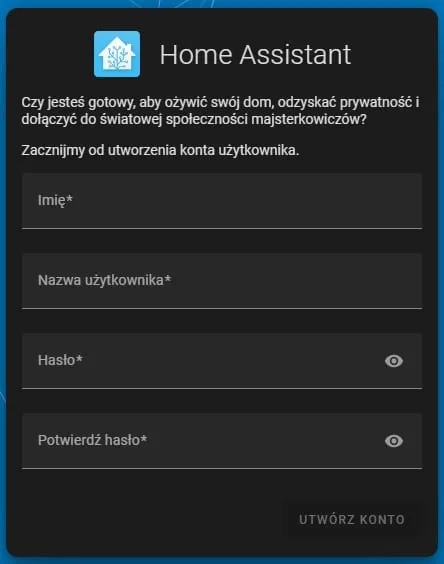
Home Assistant - first start
2. In the next step we enter the name of our home and the location. Then we choose the Next button.
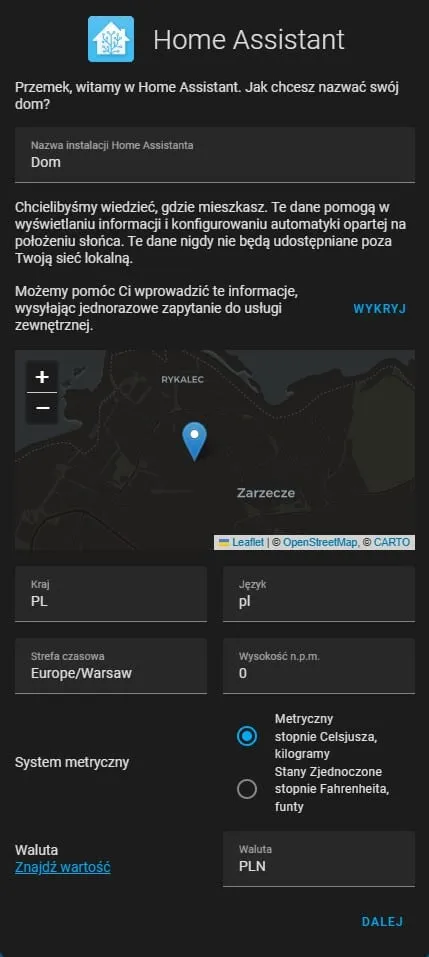
Home Assistant - first start - location
3. We choose whether we want to send anonymous data about our installation to the Home Assistant creators.
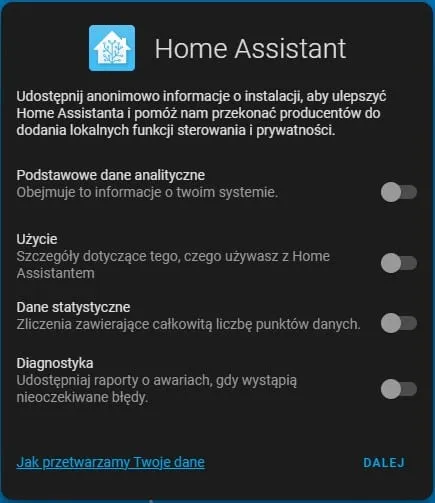
Home Assistant - first start - statistical data
4. Home Assistant will tell us that we can run an initial device setup. We click Finish.
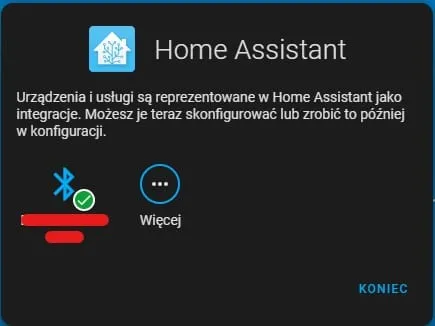
Home Assistant - first start - detected devices
5. The main view of the Home Assistant system should now appear. At the very beginning it is a bit raw, but later you can “dress it up”. Time to move to the main part of the job. We will configure our Supla system with Home Assistant over MQTT. How do we do that?
We move to the next step, that is we log in to our Supla account.
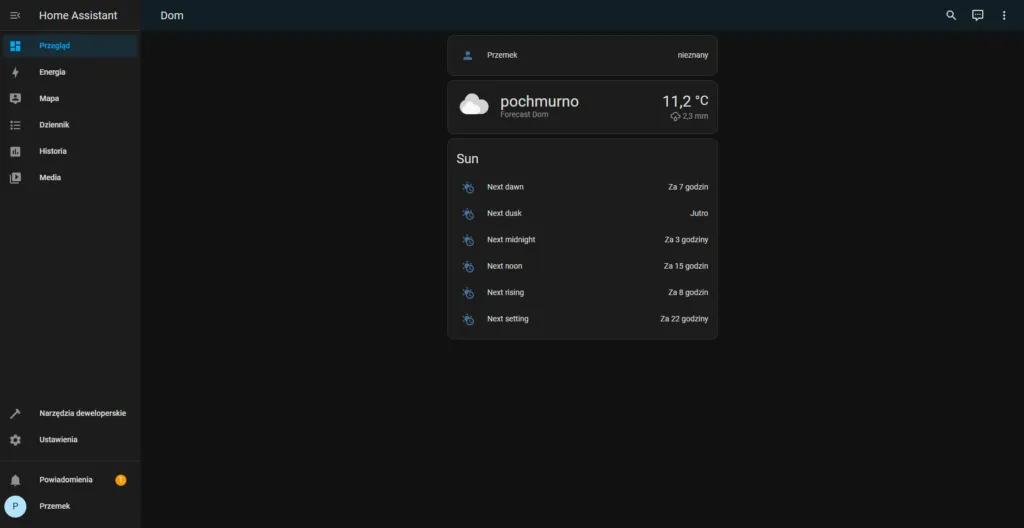
First start of Home Assistant
Configuring the Supla integration with Home Assistant over MQTT
- After logging in to the Supla account, choose the Integrations option from the Account menu.
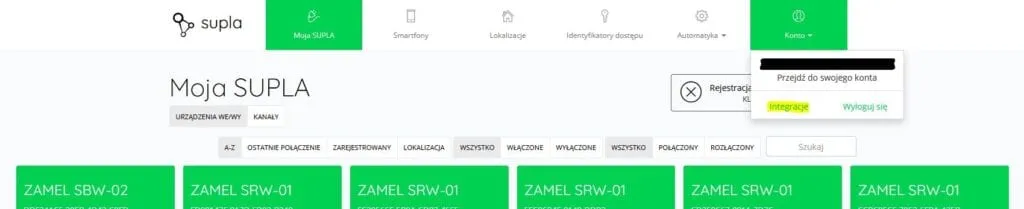
Supla Cloud Account Integrations
2. In the MQTT Broker tab we start our broker. We press the Enable button.

Supla Cloud starting the MQTT broker
3. The details of our MQTT broker will appear. We save the details. We will use these login details at a later stage of the configuration.
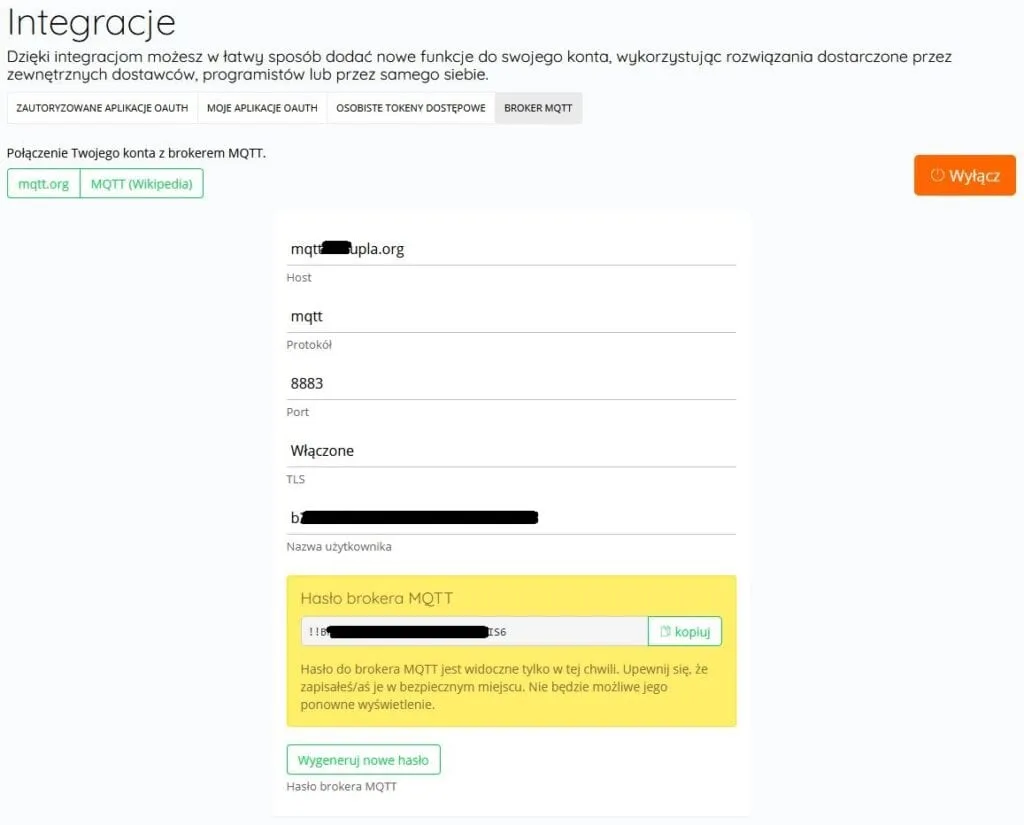
Supla Cloud MQTT broker
4. At the very beginning we need to turn on advanced mode for our user. To do that we go to our profile (in my case, bottom left in the menu, the name Przemek). We turn on advanced mode, which will let us see the hidden options for MQTT.
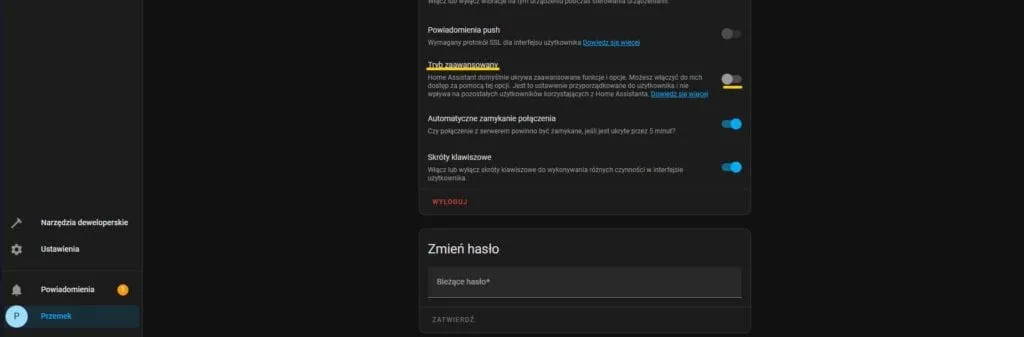
Advanced mode - Home Assistant user profile
5. In HA we go to the settings and click the Devices and services option.
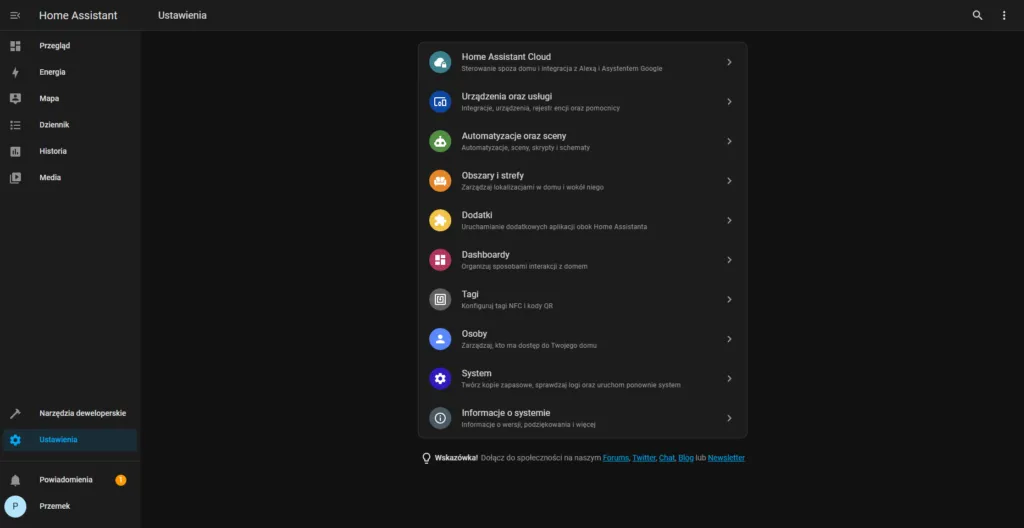
Home Assistant - Settings
6. In the bottom right corner we press the Add integration button and choose MQTT from the list.
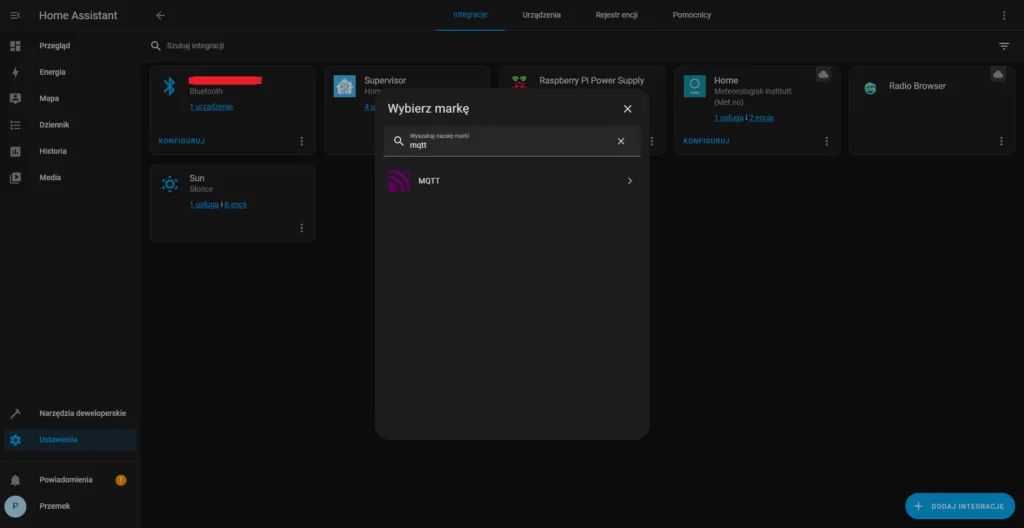
Home Assistant - Adding the MQTT integration
7. In the next step our choice again falls on MQTT.
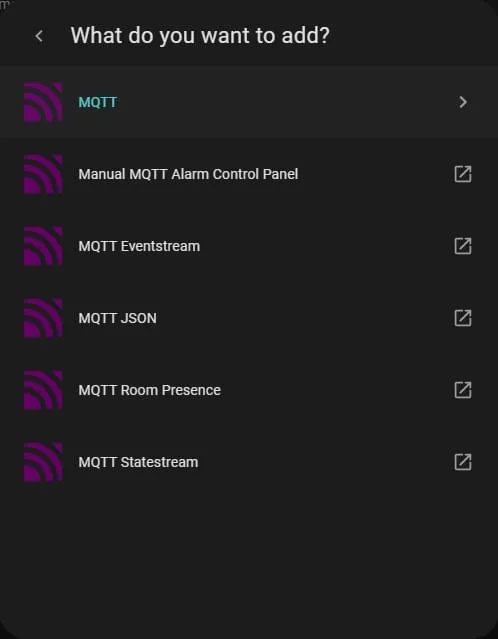
Home Assistant - Adding the MQTT integration
8. We fill in the details from our Supla MQTT broker.
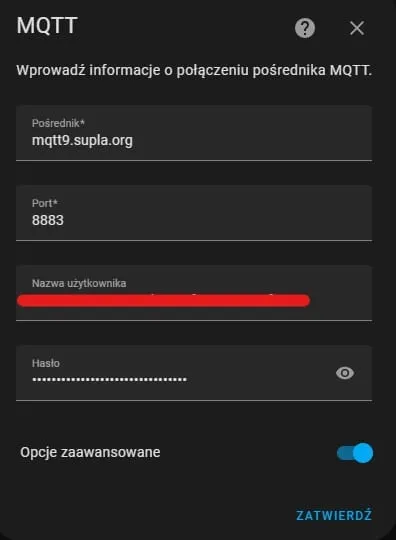
Home Assistant - Configuring the MQTT integration
9. We press the Submit button. In the next stage an extended configuration window will appear. We fill everything in as in the picture below. We leave the MQTT protocol set to 3.1.1 and MQTT Transport: TCP. When done, we confirm this stage.
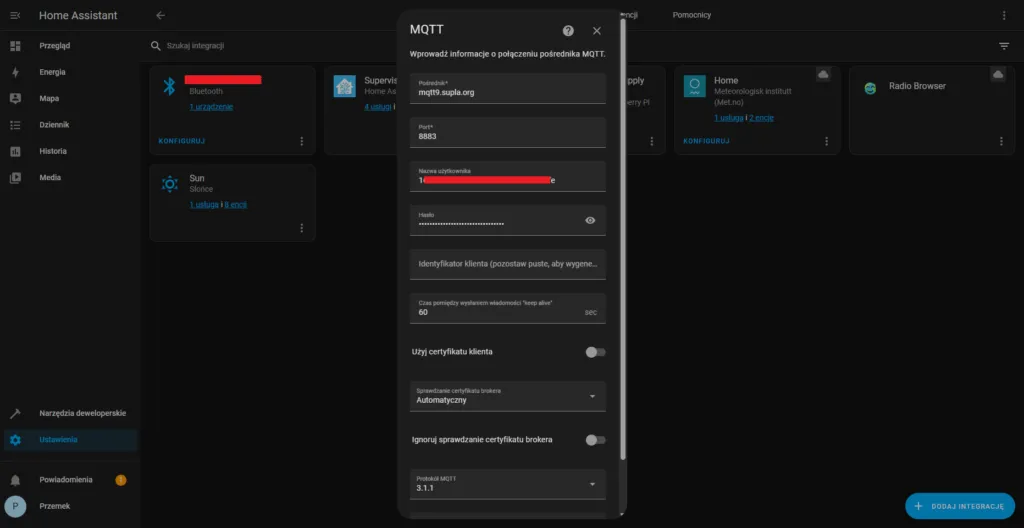
MQTT integration settings in Home Assistant
10. That’s all. A correctly configured MQTT integration will show a similar window with the Supla devices from the Supla Cloud account.
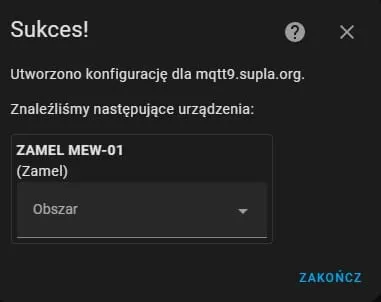
Home Assistant - Supla devices detected over MQTT
11. Voilà and done! We have Home Assistant correctly configured with Supla. From now on you can control your Supla devices. Just go to the Overview tab.
If you would rather have someone set this up for you along with the rest of the installation — I do Home Assistant integrations at TECH.WILDE.
New posts also go out over RSS — no email address needed. Subscribe via RSS