Node-RED — automation basics in Home Assistant
Use what Home Assistant and Node-RED can do to build simple automations with Supla receivers. A step-by-step example with MEW-01 and ROW-01.
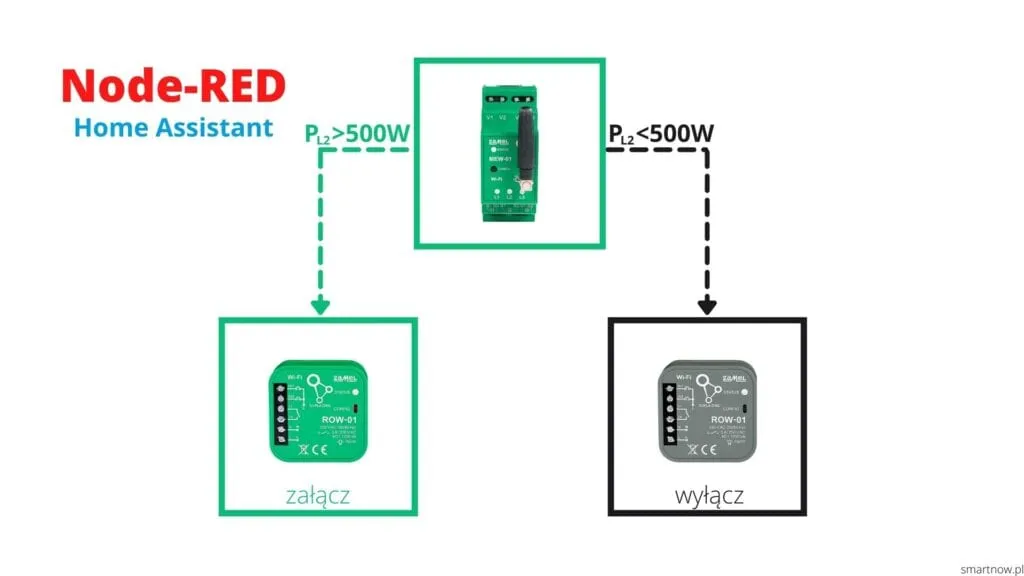
Table of contents
I work at ZAMEL. The devices described on this blog were provided to me by the company. All opinions and assessments are my own - the company had no influence on the content of the published articles.
Node-RED — what is it?
Automations with the Home Assistant software are really very simple. We can build them directly in the system itself or with external software, for example Node-RED. In this article I will focus on a simple automation built with exactly that kind of program. Using Supla devices as an example, I will show how to switch on the ROW-01 receiver when the MEW-01 energy monitor detects active power consumption above 500W.
Are you wondering what Node-RED is? Node-RED is software that was developed in 2013 by IBM. Today it is an Open Source project developed by a large community. The program lets you build advanced algorithms for different applications and automations using graphs connected with each other. It is often used in projects related to the Internet of things, smart home and more. It also has more advanced uses, even commercial ones. Node-RED is quite easy to use for people who are not fluent in programming. If you were looking for a solution that will make your home smart, I think you have come to the right place. Let us move on to installing it.
Note! This post shows the basics of Node-RED and a very simple example of an automation you can build. It is very likely that it will have no practical use at home.
Installing Node-RED
1. First let us check whether we have Home Assistant correctly installed and configured.
If you do not know yet what this system is, I encourage you to read this article: Supla configuration for Home Assistant over MQTT.
I assume you already have HA installed and you are ready to build your first automation. For that we will use the Node-RED package available in Home Assistant. We go to the Supervisor tab and then to the Add-on store.
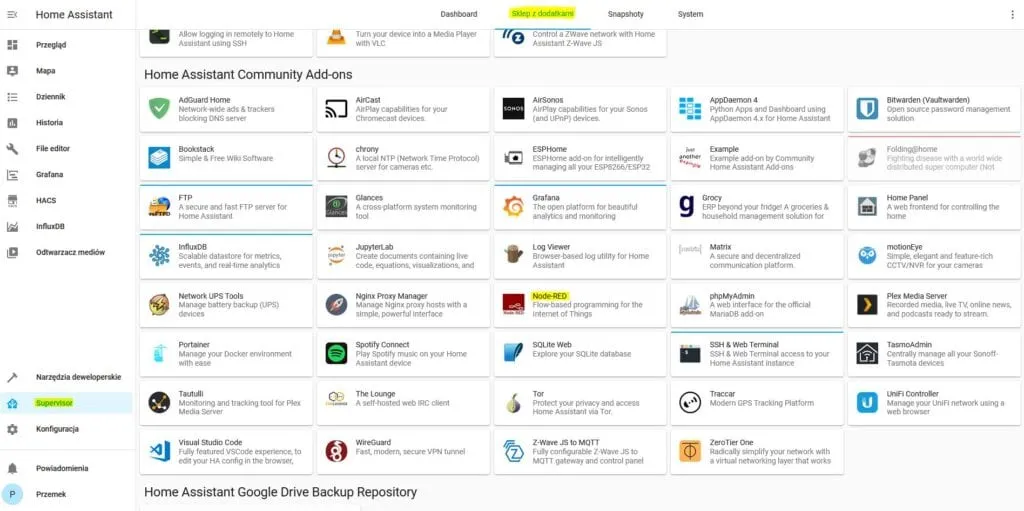
Node-RED add-on store
2. We find the Node-RED program on the list and move on to installing it.
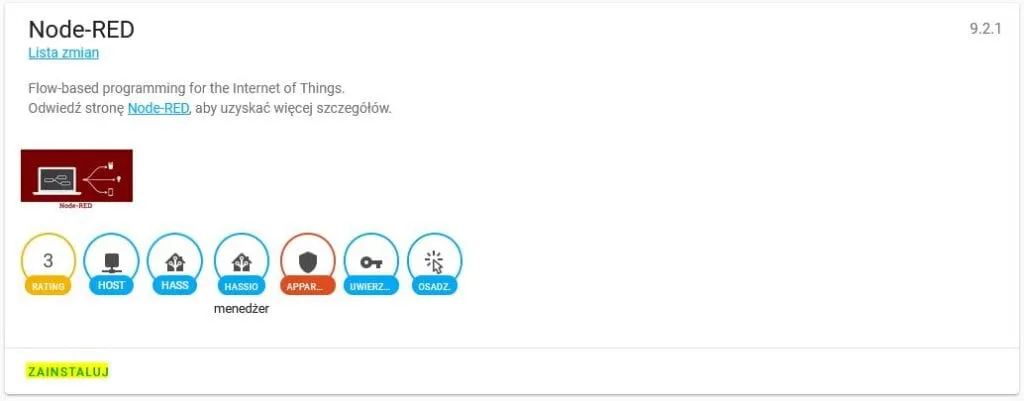
Installing Node-RED in Home Assistant
3. The installation should take up to a few dozen seconds. Once it is installed correctly we will see the right message on the screen. Time to move on to the configuration.
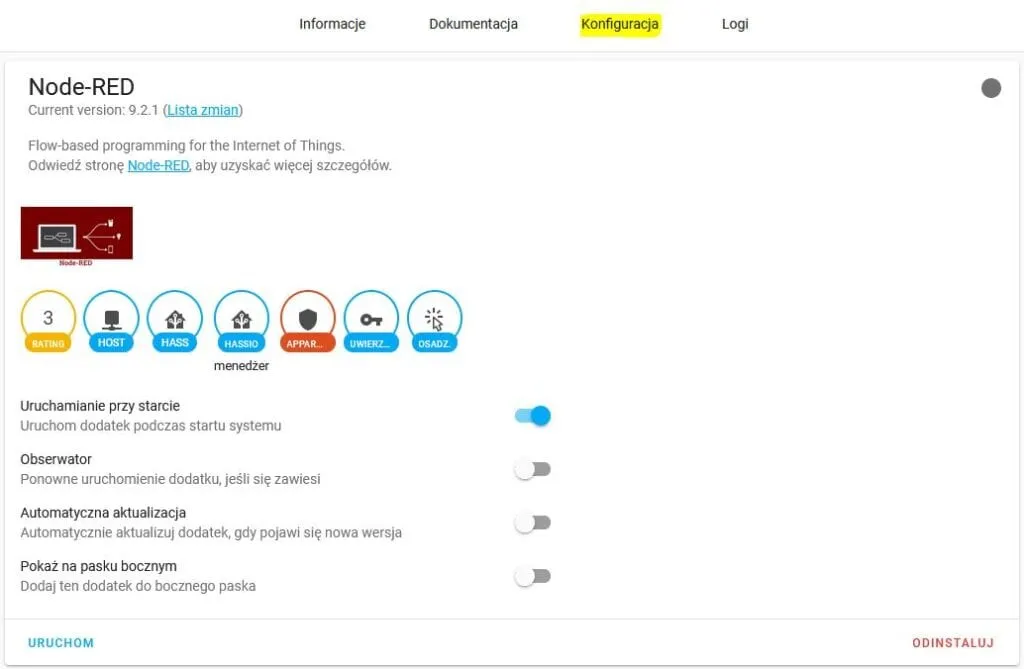
Configuring Node-RED in Home Assistant
4. In the next step we will have to fill in the configuration file. Without it we cannot go any further, because Node-RED will not start correctly. We fill in a few basic pieces of information (I put the required ones in bold, I will not discuss the rest):
credential_secret: HardPassword123 (you have to give an example password)
theme: default
http_node:
username: ‘’
password: ‘’
http_static:
username: ‘’
password: ‘’
ssl: true (if we do not use SSL, we enter false)
certfile: fullchain.pem
keyfile: privkey.pem
require_ssl: true (if we do not use SSL, we enter false)
system_packages: []
npm_packages: []
init_commands: []
Is the file filled in correctly? We can save it. To do that we choose the SAVE button.
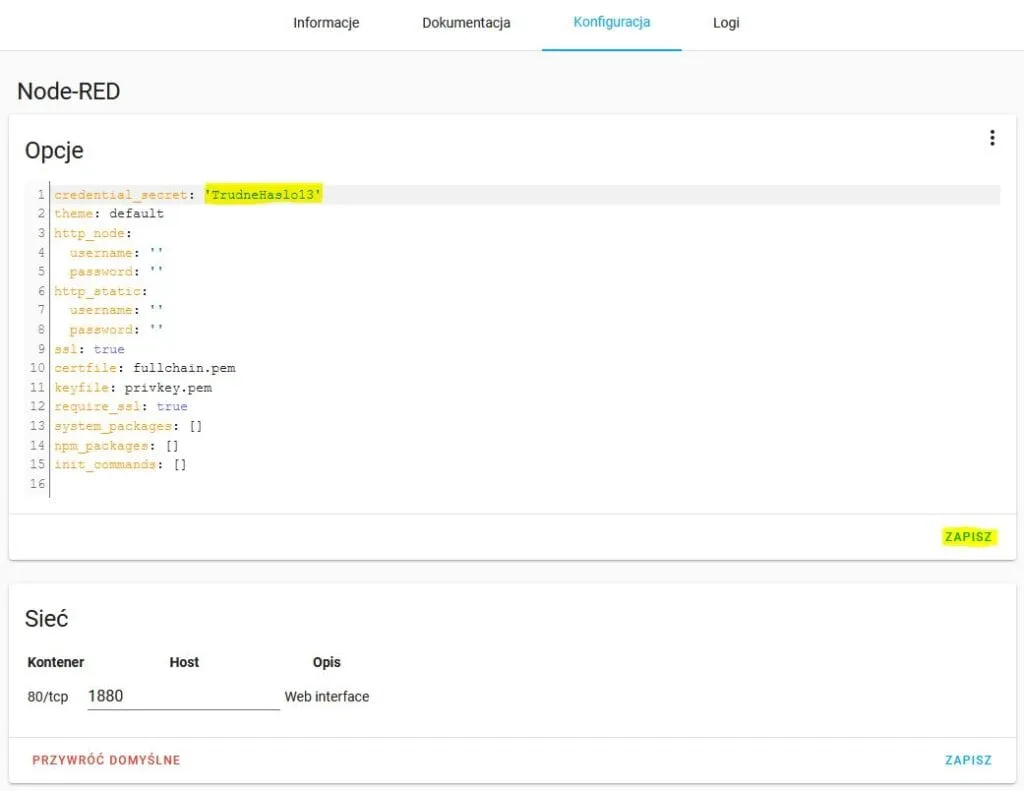
Setting the password for Node-RED in Home Assistant
5. Time for the first start of Node-RED. In the window of this add-on I encourage you to create a shortcut to the app itself. All you have to do is choose the Show in sidebar option, so we will have easy and quick access to the program from Home Assistant.
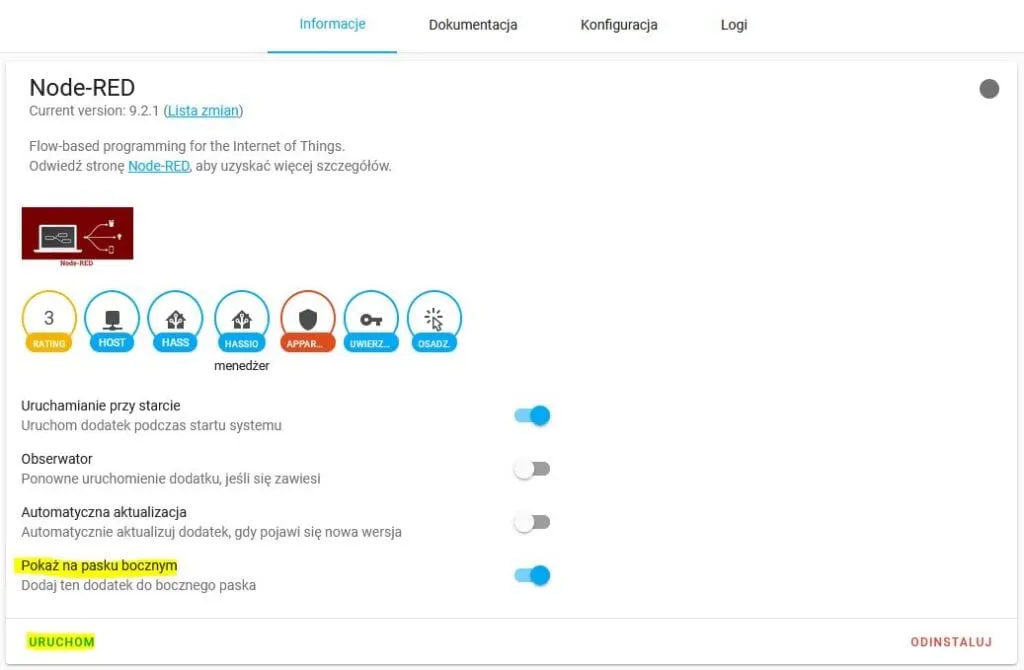
Starting Node-RED
The first automation in Node-RED
1. Below I present the assumptions of our function.
ASSUMPTIONS
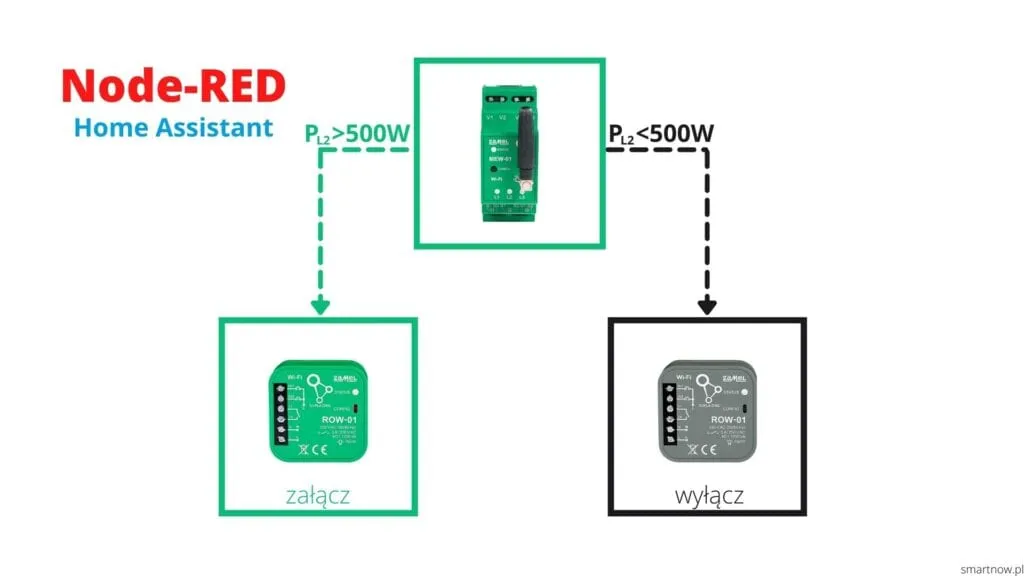
A simple Supla automation with Node-RED in Home Assistant
Our automation will use two devices. The MEW-01 electricity monitor as the measuring element and the ROW-01 in-wall receiver as the executive element. Of course there is nothing to stop you from using other devices, from any Smart Home maker that is open to integrations.
The MEW-01 electricity monitor will measure the active energy drawn on phase L2. The ROW-01 receiver will switch an indicator lamp on and off. So we will check 2 states:
a) The relay in ROW-01 will be switched on when MEW-01 detects more than 500W on phase L2,
b) The relay in ROW-01 will be switched off when MEW-01 detects less than 500W on phase L2.
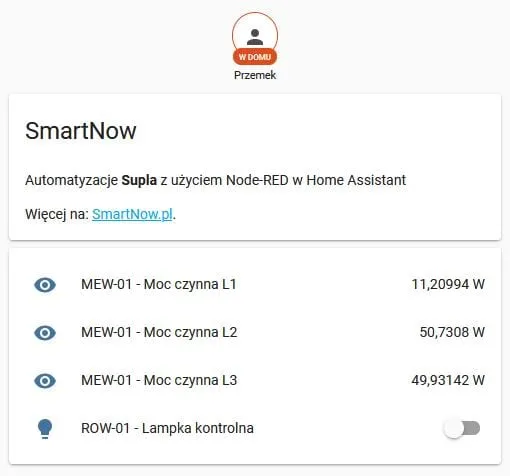
Example entities in Home Assistant
2. Now that you know the assumptions of the algorithm, we will move on to starting Node-RED. From the left side menu we choose the right icon and start our program. An empty board will appear, and on it we will build our advanced function :-).
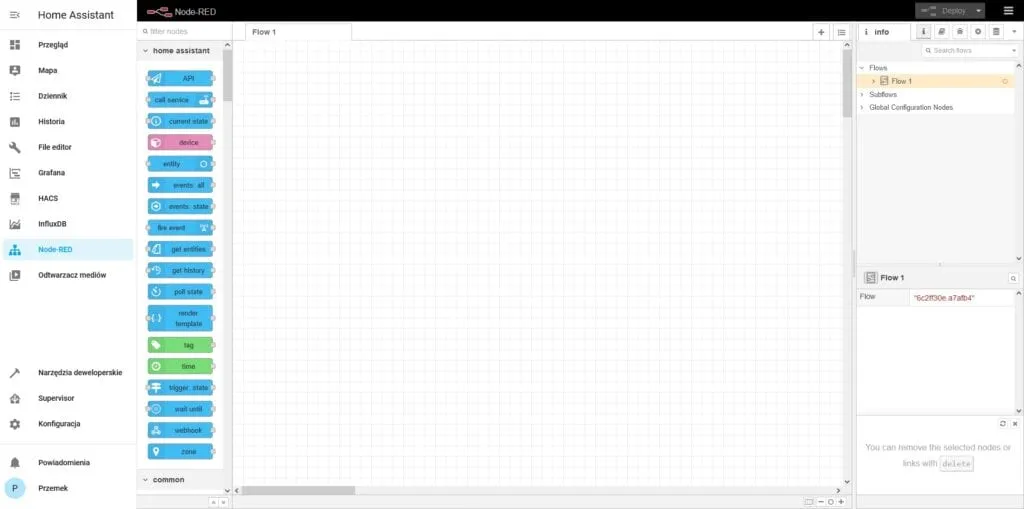
A look at Node-RED in Home Assistant
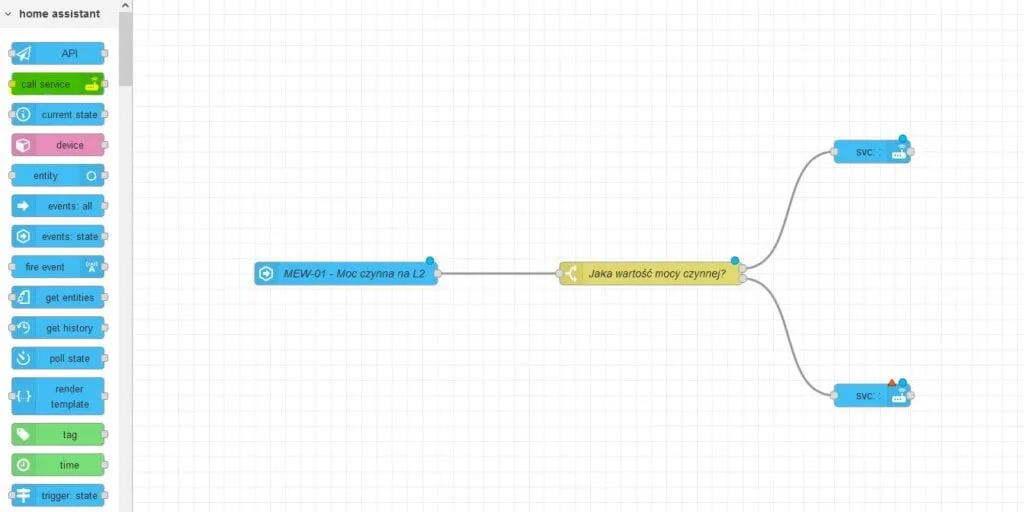
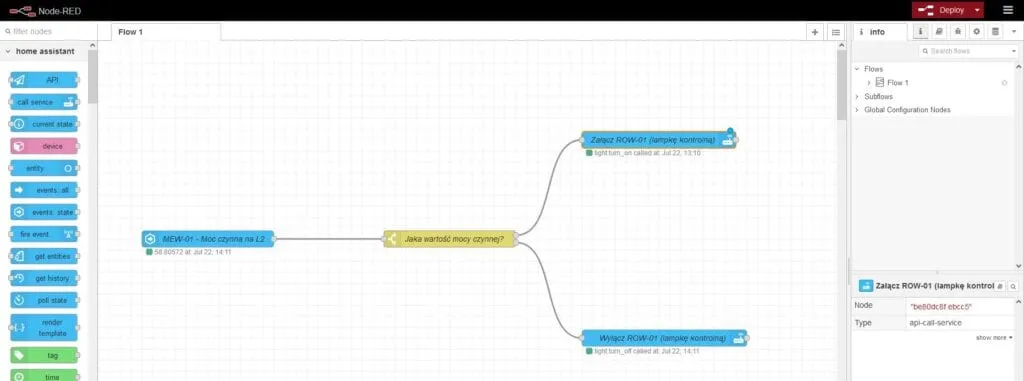
3. Below you can see what the finished automation looks like. Every element you see here has its own role. We have checking objects and executive ones. All the elements you see here are nodes, the so-called Nods. Later in this post I will use the term Nod.
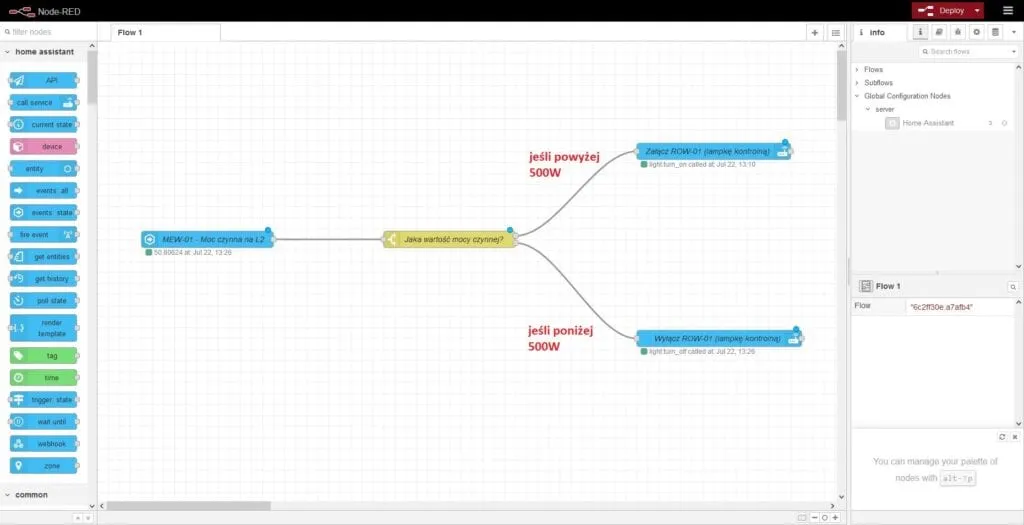
The first Node-RED automation in Home Assistant
4. Our first nod will be events: state. This is a Nod that is triggered every time the state changes. It will show the value of the active power on phase L2 and it will change when the value of this power changes.
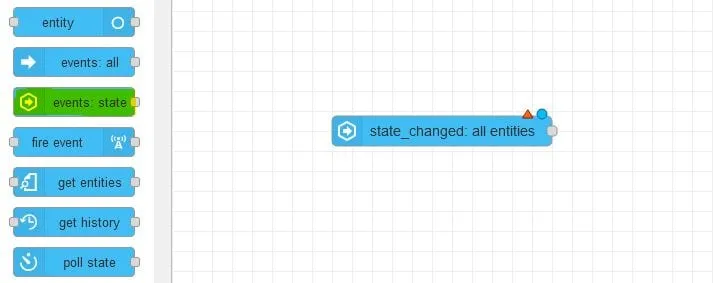
Nod events state
5. We drag it onto our board from the side menu (the library of Nods). Once we have it on the board it is time to configure it. We click on it and fill in only a few important fields:
- name - the name of our nod (it will be easier for us to identify it);
- server - the Home Assistant installation (with a fresh installation there will be only 1 server to choose from);
- Entity ID - the ID of the entity that holds the active energy value on phase L2 from the MEW-01 device (depending on how the device is named on the Supla Cloud server side, the entity can have a different name; in my case it is: sensor.monitor_energii_elektrycznej_power_active_phase_1)
Note that in the configuration of this nod I ticked 2 options:
- Current State Equals Previous State - the Nod will not be triggered when the last value equals the previous one - I think that is clear;
- Output On Connect - the Nod is triggered every time after a save, after the server starts, after the board in Node-RED is refreshed;
That is all for a start. I will not focus on explaining the other options, because it is not needed now.
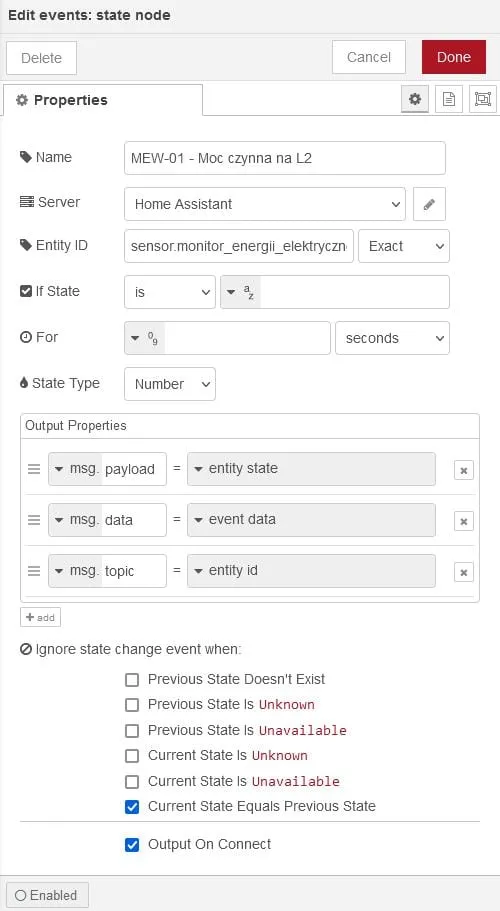
Configuration of the nod events state
6. We have correctly configured our first Nod, which shows the value of the active power on L2. Time to check whether this power is within our assumptions. We will use a logic function for that. A switch works best here. This node will check the power on L2 and put the information on one of its outputs. As usual we find the right nod on the left side of the screen and drag it onto our board. Let us remember to connect it with the first node.
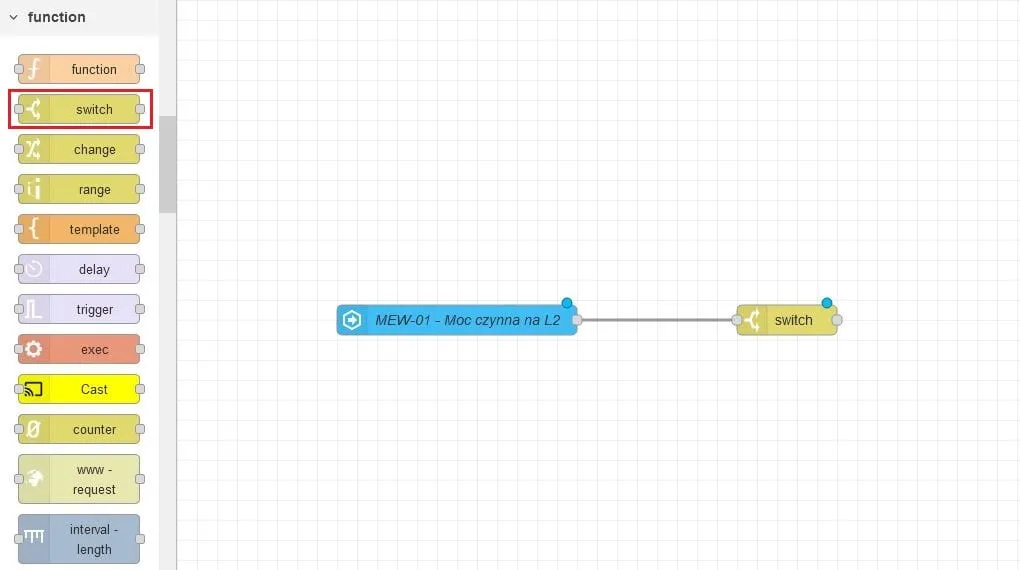
Nod switch
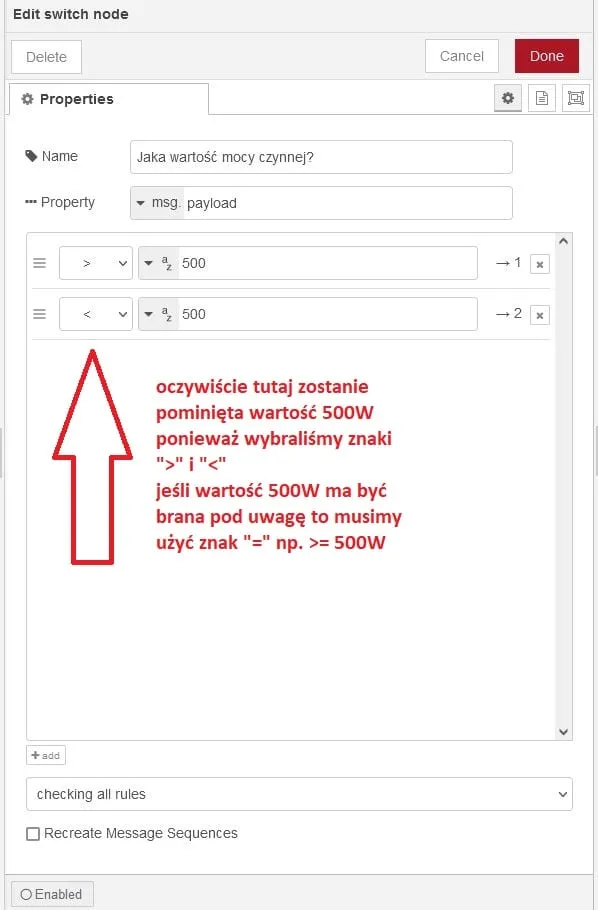
7. Once we have the switch on the screen we move on to configuring it. We set the name and create 2 conditions:
-
greater than > 500W
-
less than < 500W
Note that I used the less than and greater than signs. If I wanted the value 500 to be taken into account, I would have to use the equals sign, for example >= 500W.
Switch will check the value that events: state gives it and send the right information to one of the outputs. In our case there will be 2 outputs, because we have only 2 conditions. The information about whether the value is greater or less than 500W will reach the next nod called call service.
8. From our library we find the next Nod called call service. This node will trigger a specific action. It can be switching on, switching off, toggling, sending information, notifications and many more. We add two such nods to our board. Then we have to connect them with our switch.
Nod call service
9. Time to configure both nods:
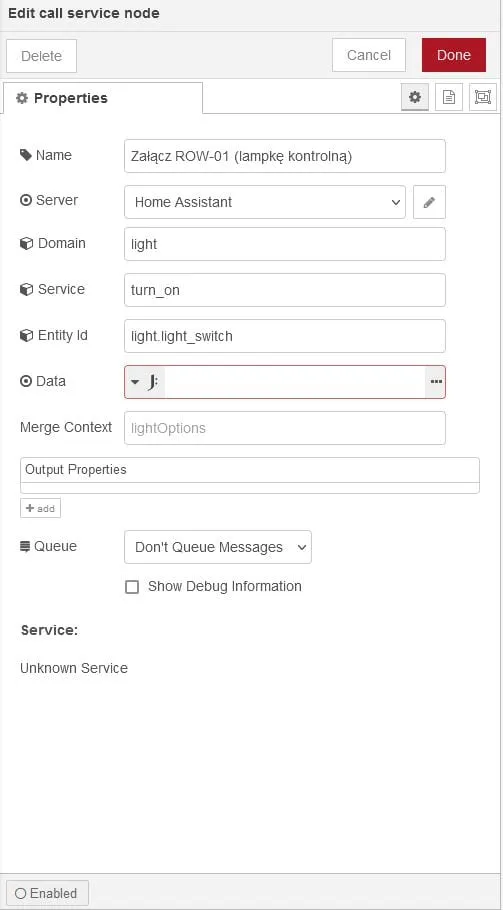
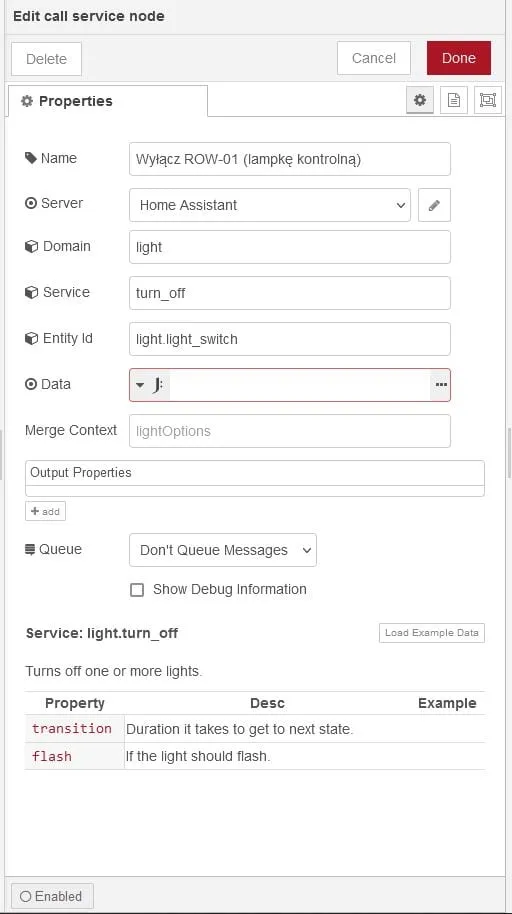
ROW-01 is our indicator lamp. In Home Assistant it appears as a light. In the Domain field we choose light.
Then we set the action that will be carried out, that is the Service field. As planned we chose turn_on and turn_off. These are responsible for switching on and switching off.
Now we mark which entity this action refers to. My ROW-01 appears as light.light_switch. So that is the entity I choose.
Configuration of call service — switch on
Configuration of call service — switch off
Configuration of call service
10. Once we have configured and connected everything correctly, we can move on to running our program. We press the Deploy button. At this moment our function has been saved and the automation has been started.
Starting the Node-RED automation
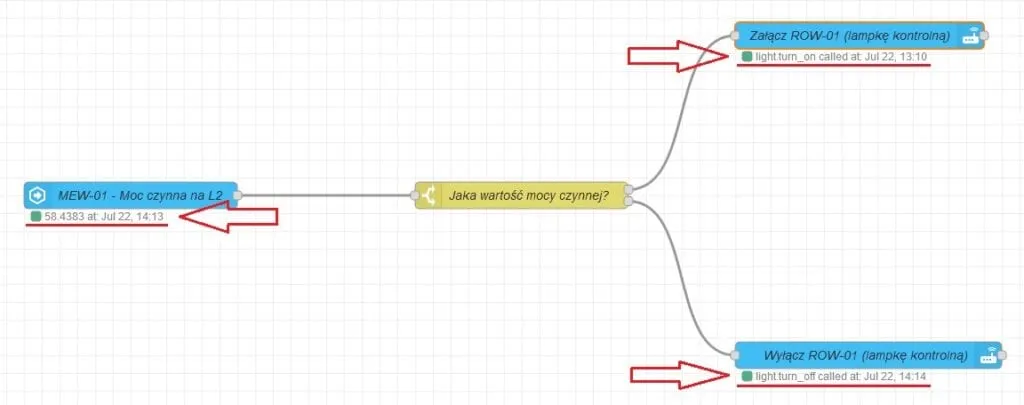
11. Notice that the action is being carried out. As you can see, our nod called events: state shows the value of the active power on phase L2. Switch interprets this value properly and triggers the right call service.
The last run of the Nod
12. Everything works! From now on we can enjoy our simple automation.
Below 500W
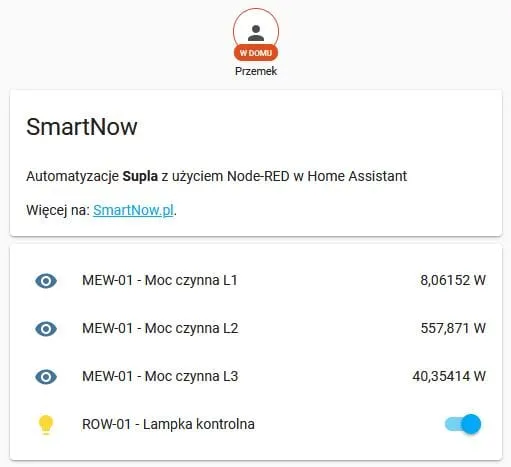
Above 500W
Summary
Of course this was only a simple example of an automation you can build with Node-RED. The program lets you create very advanced functions. For example controlling the heating at home, controlling the blinds depending on the position of the sun above the horizon, or the output of a photovoltaic system and using the surplus to run heating, for example an electric water heater.
There are really many solutions you can build. When you use Home Assistant and Node-RED, or another system of this kind, you are not limited to one manufacturer. This software will let you manage many receivers from different manufacturers in one app available on many platforms.
That is all I wanted to show today. If you have any suggestions, feel free to send me a message by email.
If you would rather set this up together with me, book an online Supla setup session. You share your screen and I guide you step by step. Sessions are in Polish.
New posts also go out over RSS — no email address needed. Subscribe via RSS